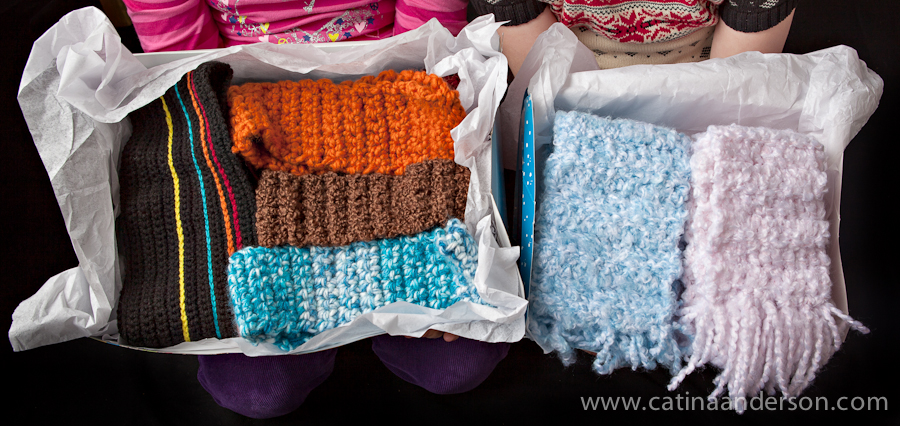
This project is one of the first my daughters did on their own. With chunky weight yarn and a 8.00 mm hook it works up quickly (a plus with an 8-year-old beginner). It’s also an easy one they can make as a gift and it’s one of the simplest and fastest for a beginner to complete. Here, during Random Acts of Kindness week, I wanted to share the instructions for how we made ours so you could whip up a headband too if you’re looking for a crochet-inspired kindness idea.
We actually stumbled into this project when one of my girls was making a scarf for her American Girl Doll and got bored before she finished it. We realized that if she stopped where she was and attached the two ends it was just long enough to make a headband earwarmer. She was thrilled and happy to show off her new fashion accessory!
This “pattern” is more a set of guidelines than an actual pattern because depending on the yarn and hook size you choose as well as the person you’re making it for (kiddie vs. grown up) you can make some easy and quick adjustments. I’ll talk about that at the end.
But here’s the exact instructions to make this one which fits my 8-year-old daughter’s head nicely.
Ribbed Ear Warmer Headband
Yarn: We used Serenity Chunky Weight from the Deborah Norville Collection in Red Ochre for this one. (The top headband in the box shown above).
Hook Size: 8.00 mm (L)
Chain 8, turn
Row 1: Working in back loop only sc in 2nd ch from hook and each ch across (7), ch 1, turn
Row 2 – 40: Working in back loop only sc in each sc across (7), ch1, turn
Finishing: Matching the sc in row 40 to the stitches in the first row, join with a row of slip stitches. Finish off. Weave in Ends.
That’s it!
Crochet With Kids Tip: If your little crocheter has a short attention span (like mine did when they first started – and really still do) try a “Mommy and Me” approach to this project. She does 2 rows (so she gets practice with the ch 1, turn as well as counting and executing the sc across), then I do 2 rows. This way she gets little breaks (and with the completion of each set of 2 rows there’s the immediate gratification of a goal-accomplished) and she sees the project grow quickly with mommy’s (or daddy’s) help.
.jpg)
What if you don’t like the chunky look of the ribbed style? Here’s one that’s a little smoother (See the blue headband at the bottom of the box on the left).

This one was made with Serenity Chunky Weight from the Deborah Norville Collection in Seven Seas.
Follow the pattern above except instead of working in back loop only, work your sc in both loops.
So… what if your little crochet enthusiast wants to make one for his/her favorite grown-up? Or maybe size it for a toddler sister or brother?
Easy to do (and a great way to introduce them to the idea that they need not follow a pattern).
Simply determine how wide you want it to be to cover the ears and work that many chain stitches plus one (to turn).

Then start to crochet your rows. When you think you’re getting close to the size you need just hold it up to someone to try it out. Need a few more rows? Keep going! Easy peasy!
We actually found that about 40 rows worked for both my head and my girls… and that it depended somewhat on the type of yarn used and whether you did the ribbed vs. the flat headband.
Same thing goes if you want to use a different hook size or a thinner yarn. Just adjust the number of chains in the initial chain row for width and add rows until it’s long enough to wrap around the head. In fact, I really like to NOT tell my kids how many rows to do because sometimes the number (40) can seem REALLY big and they get overwhelmed before they start.
Crochet with Kids Tip 2: If your little crocheter is venturing off on their own for the first time celebrate their success! Try to avoid pointing out mistakes such as uneven rows, as hard as that might be for us pattern-following grown-ups. Instead celebrate the achievement and hard work! When you’re first learning this sure is hard work! Success and celebration will generate excitement for the next project! If they are really struggling with counting then the Mommy and Me approach trading off every 2 rows helps to avoid major issues.
If you’d like to donate these to the homeless check out yesterday’s post for 2 great organizations. Or, make one for someone you love! Anything handmade is a beautiful gesture of love and kindness!

.jpg)